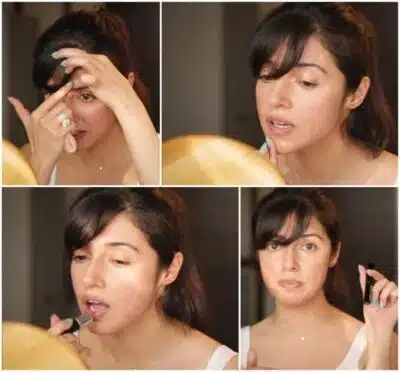
Whether you are going out for a formal meeting in your office or planning to organize a get together with your colleagues and friends, the basic tip to look fabulous and draw the attention of the audience is by setting your hairs.
However, visiting the salon every day to get a perfect hairstyle is a quite troublesome and expensive solution and especially in the recent era where you can easily get the desired hairstyle just by using a hair straightener or curler.
Though you can find several tutorials on how to form curls, the essential factor that is often missing is the proper and most appropriate way of how to curl your hair with curling irons and the best way to use this appliance is.
For instance, how are you are carrying the curling iron, and are you twisting it appropriately? These are some of the major issues woman faces while utilizing a curling iron.
Another essential factor to form the natural-looking yet attractive curls is to buy the top-most curling iron.
List of a Few Best Culers:
If you are tired of searching the best and superior quality curling iron for fine hair then here I am presenting a list of few curlers that can aid you by providing the desired curls.
- Beachwaver S1 Curling Iron – the best thing about Beachwaver is that it provides you with a wide temperature selection i.e., you can either set the temperature of this iron to 140F and can increase it up to 410F. Featuring the dual-direction autorotation system, Beachwaver is probably the right fit for women.
- Babyliss Nano Titanium Curling iron – BabyLissPro is especially known for designing and manufacturing hair products such as curlers, straighteners, and much more. Although this appliance possesses a comparatively low heat setting than that in the Beachwaver S1 curler, this gadget is smooth on your fine hairs. You don’t require heating up this curler for a long duration rather it becomes ready to process within 30-40 seconds of heating.
- Bed Head Curlipops Curler – the Bed Head Culipops comprises a barrel that supports even heating and thereby, protects your fine hair from unwanted damage. With the heating capacity of 400F, this appliance comes with the protective glove, dual voltage iron, and 2 years of warranty.
So you can either opt for any of the above-listed curlers or can buy other quality appliances. With that let’s proceed to the go-to-go guide on how to curl your hairs effectively using the best curling irons
How to curl your hair with curling irons?
From creating tight and spiral curls to forming bold waves, a curler can be used for diverse purposes. The length of your curls depends on the curling iron you use. So here I am presenting the major steps you need to consider prior to running the device on your hairs.
Method 1: Basic Curling
-
Heat up the curling iron
Plugin the curling iron and heat it up for at least 10-15 minutes to get the best possible curls. If you are operating it on thick hairs, it is recommended to heat up the same at 430 degrees whereas 320 degrees is sufficient for curling fine hairs. Though you can heat it to 400F (only some curlers can be heated to this extent), charging it at the lowest temperature can avoid unnecessary hair damage.
-
Brush your hair properly
Avoid running a curling iron on wet or tangled hairs as this would result in hair damage and improper formation of curls. Use a dryer to dry up your hairs and brush it properly to remove tangles.
-
Apply some heat protectant
The use of heat protectant is not limited to protecting your hairs from damage that can be caused due to curling iron but the same also add shine to your hairs. Once you have dried your hairs, spray the heat protectant throughout your hair before using the curler.
-
Divide your hairs into various sections
Dividing your hairs into sections makes it easy to ascertain the parts that are already curled and the sections that are still to be processed. There should be at least 2-3 inches of gap between each section and you should aim to separate your hairs into 4 equal sections.
- Curl your hairs in sections
Hold the lower edge of your hairs using your fingers and use the wand of curler to wrap up the particular part of the hairs around the barrel. While doing so make sure to avoid overlapping the hairs as this can lead to the limp sections. The major reason for the recommendation of using a wand rather than clamp is to prevent the creation of creases and folds in your curls. In order to create the natural-looking curls, it is highly advisable to prefer swapping the direction of curls into the clockwise and counterclockwise direction.
-
Instantly pin up the section of hair that is curled
Fastening the curled portion not only helps you to mark it done but it keeps up your curls intact. Seize the lower section of your curl and tie it to your scalp using the fastening hair clips or bobby pin.
-
Repeat the process
You are then required to reiterate a similar procedure to your entire head unless all your hairs are curled and pinned up. Don’t take out the pins immediately after forming the curls instead wait till your hairs are no longer hot.
-
Take out the bobby pins
Once your hairs get in a normal state, remove all the bobby pins fastened to your curls. Quickly shake the curls to see if any part is remaining or looking untidy.
-
Manipulate the curls
Though it is not necessary to tousle the curled hairs, it can make your curls look brilliant yet natural. If you desire to add extra shine to your curls then use your fingers and tousle the curls to form waves.
-
Spray your hairs
Before spraying the hairspray on your curls, examine if all your hairs are covered and your curls aren’t looking messed up. Once you are done with curls, apply hairspray to set the hairs. Make sure to not overspray as it can result in crispy hairs.
Method 2: Spiral Curling
-
Grab a section of hair to curl
If you desire to form spiral curls i.e., top-to-bottom curling then the basic step to commence with is grabbing a small section of your hairs to curl. This can help in the formation of elegant yet tight curls.
-
Place the curling iron at the top of your hairs
Unlike the first method, you need to use both the parts of a curling iron to squeeze the hairs i.e., clamp and wand. Place the device at the top portion of your hair keeping it open.
-
Start curling
Once you have positioned the curling iron, the next step is to wrap up the hairs gently around the curling iron. Make sure to cover the whole section of your hair.
-
Clamp the hairs in the iron rod
Hold your hairs tightly in the iron rod for about 10-20 seconds. However, it is a random measure as the actual time required to clamp the hairs depends on the curling iron you use and its heat settings.
-
Repeat the method
Clamp and unclamp your hairs to form spiral curls. Repeat the method and make sure to cover all the sections.
Method 3 – Tube curls
-
Grab a section to curl
If you desire to form firm curls then hold your hairs in smaller sections while you can take large portions to formless tight curls.
-
Place the curling iron at the bottom of your hairs
Since this method is to form tube curls i.e., bottom to top, the curling iron should be positioned at the bottom of your hairs and you need to drag it to the top of the same. Similar to that in spiral curls, make sure to keep the iron rod open and use both the sides i.e., wand and the clamp to hold the sections of your hairs tightly.
-
Clamp the device
To get full-length curls, twist and turn the curler unless it reaches your scalp. Another thing to consider while proceeding with the tube curls is to curl your hairs away from your face rather than towards the same.
-
Hold the hairs in the iron
In order to form the tube curls, hold the hairs tightly in the iron for 10-20 seconds. You might require holding it for a longer duration if the heat settings of your curler are not appropriate.
-
Repeat the method
Reiterate the procedure to cover all your hairs and form amazing curls
Final verdict
Following the above-listed methods can help you draw perfect and natural-looking curls within an hour. However, while proceeding with any of these methods, it is essential to take extra care while using the curling iron.
So having read this guide, we assume that you received enough knowledge regarding the diverse types of curls and how to create them. So what are you waiting for? Get the best curling iron and draw the attention of an audience with the wonderful curls.
-
Sanya
- July 8, 2018